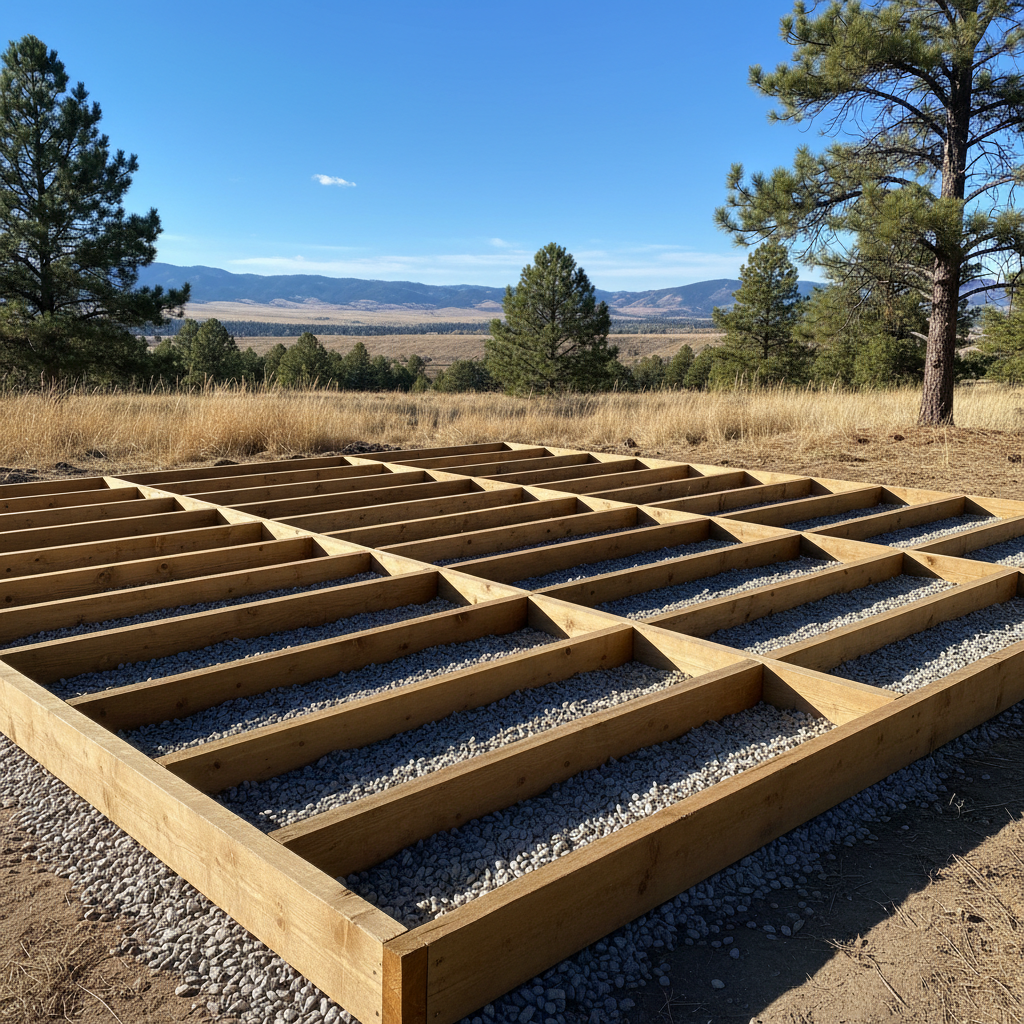
Let us talk about shed foundations. You are putting in a new shed, maybe for tools as well as a workshop as well as extra storage. That is good, but before you even think about the walls or the roof, you need to get the base right. We have seen too many people in Billings try to cut corners here, and it always causes problems later. A good foundation is not just about keeping your shed level. It protects against moisture as well as pests as well as our wild Montana weather. It is the backbone of your whole shed project.
Before You Dig: Planning and Permits
First things first, do not grab that shovel yet. You need a plan for your Custom Sheds Billings project. What kind of shed are you building? How big will the shed be? What are you storing in it? These questions tell you the type of foundation you will need for your Custom Sheds Billings project. A small garden shed for hand tools is different from a large workshop that holds heavy equipment.
Next up are permits. This part can be a little tricky in Billings. Generally, if your shed is under 200 square feet and is detached from your house, you might not need a full building permit. You will almost always need a zoning permit as well as a land use permit. You do not want to build something only to find out you have to move it or tear it down because you skipped a step with the city. Always check with the City of Billings Planning Department before you start any Custom Sheds Billings work. They can tell you about setbacks as well, which tell you how close to your property lines you can build.
Do not forget about our Billings soil. We have a lot of clay loam around here. This soil can be tricky with moisture. It expands when it is wet as well as shrinks when it is dry. Proper drainage as well as a solid foundation are important to stop shifting and cracking later on.
Foundation Types: What is Right for Your Shed?
There are a few main types of foundations that work well for sheds. Each type has its good points as well as its bad points. This is especially true when you think about our local conditions as well as what you want to do yourself.
1. Skid Foundations (DIY-Friendly for Smaller Sheds)
This is probably the most common as well as DIY-friendly option for smaller to medium-sized sheds. Skid foundations use pressure-treated lumber, like 4x4s or 6x6s. These pieces act as runners that the shed frame sits on. You place these skids directly on a prepared, level gravel bed as well as on concrete blocks.
- The DIY Part: You can handle this yourself for a smaller shed. You will need to clear and level the site first. Then you lay down some landscape fabric to keep weeds out. After that, you spread and compact a good layer of gravel. Make sure that gravel is compacted tight. Then, you place your pressure-treated skids on top. You must make sure they are perfectly level.
- When to Call a Pro: If your site has a big slope, getting it truly level for a skid foundation can be very hard. For larger, heavier sheds, you might want a professional. This helps make sure the base is absolutely solid as well as can handle the weight.
2. Gravel Pads (Good Drainage, More DIY Potential)
A gravel pad is a larger, compacted bed of crushed stone. Your shed, often with a skid or wood frame, sits on this pad. It is good for drainage. This is a big help with our freeze-thaw cycles as well as that clay loam soil in Billings.
- The DIY Part: This is similar to a skid foundation project. You can prepare the site yourself. You lay fabric as well as spread and compact the gravel. The main thing here is proper compaction. You also need to make sure the pad is perfectly level. You will want about 4-6 inches of compacted gravel.
- When to Call a Pro: For larger sheds or if you are working with a very uneven site, getting a large gravel pad perfectly level and compacted can be a lot of work. A professional with the right equipment can do this work quickly. They will also make sure it is done right.
3. Concrete Slabs (Permanent, Best for Larger Sheds, Often Pro Work)
A concrete slab is the best choice for permanence as well as strength. It is a solid, reinforced concrete floor. This floor serves as your shed's foundation. This is what you want for bigger sheds as well as workshops. It is also good for anything that will hold heavy equipment or needs to be absolutely solid and permanent.
- The DIY Part: For a small, thin slab, an experienced DIYer might try it. You would need to dig out the area. Then you build forms as well as lay down a vapor barrier as well as rebar. After that, you pour and finish the concrete. It is a lot of physical work. It also needs precision.
- When to Call a Pro: For most concrete slabs, especially anything over 100 square feet, you should call a professional. This is also true if you are not experienced with concrete work. They will make sure rebar is placed correctly. They also know the right concrete mix as well as how to get a perfectly level finish. In addition, they know about our Billings frost line, which is around 42 inches deep. If your slab is not designed to handle that, you will have frost heave as well as cracked concrete.
During the Project: What to Watch For
No matter which foundation you choose, here is what you need to remember:
- Level, Level, Level: We cannot say this enough. At every step of the way, check your levels. A foundation that is even a little bit off will cause problems later. This happens when you are trying to frame walls as well as hang doors.
- Drainage: Make sure water will drain away from your foundation. It should not pool around it. This is important in Billings. It stops moisture problems as well as frost heave. A slight grade away from the shed is always a good idea.
- Material Quality: Do not buy cheap materials. Use good quality pressure-treated lumber for skids. Also use a proper gravel base. It is an investment in how long your shed will last.
After the Foundation: Next Steps
Once your foundation is solid as well as cured, if it is concrete, you are ready to start building the shed itself. If you chose a skid or gravel pad, you will usually build a wood floor frame on top of it. Make sure this frame is securely attached to your skids. You can also anchor it to stop shifting. If you poured a concrete slab, that is your floor. You will build your walls directly on it.
A good foundation is the difference between a shed that lasts decades and one that gives you problems in a few years. Take your time and do it right. If you are ever in doubt, do not hesitate to reach out to a local professional. We are here to help people in Billings build things. These things stand up to whatever Montana weather brings. At Custom Sheds Billings, we see many shed projects. The ones that last always start with a solid base.